
云服务器上部署 Kubersphere 和 K8s 集群
编辑
7
2026-08-25
本文统称 Kubersphere 为 KS。
环境信息
- 5 台云服务器:1 Master,4 Worker
- 负载均衡
部署过程
步骤一:系统环境设置
- 建议使用全新安装的CentOS 7.9系统。如果是之前的老机器,记得重置操作系统。如果系统默认开启了防火墙和SeLinux,记得关闭和禁用。
- 修改主机名。
hostnamectl set-hostname ks-master # execute on Master
hostnamectl set-hostname ks-node01 # execute on Node01
hostnamectl set-hostname ks-node02 # execute on Node02 ...
hostnamectl set-hostname ks-node03
hostnamectl set-hostname ks-node04
命令仅供参考,具体以实际环境为准。
- 将下列内容添加到所有服务器的本地hosts文件中。
10.100.6.124 ks-master
10.100.6.126 ks-node01
10.100.6.127 ks-node02
10.100.6.125 ks-node03
10.100.8.98 ks-node04
10.100.7.201 ks-node05
10.100.8.99 ks-node06
- 在ks-master节点中创建SSH密钥,并拷贝至本机及其他几个Node节点,以打通免密登录。
ssh-keygen -t rsa -b 4096 -C 'ks-master' # execute on Master
ssh-copy-id root@ks-master
    enter root@ks-master's password
ssh-copy-id root@ks-node01
	enter root@ks-node01's password
ssh-copy-id root@ks-node02
	enter root@ks-node02's password
ssh-copy-id root@ks-node03
	enter root@ks-node03's password
- 所有服务器实例开启chrony时间同步。
systemctl start chronyd.service && systemctl enable chronyd.service
ssh root@ks-node01 systemctl start chronyd.service && systemctl enable chronyd.service
ssh root@ks-node02 systemctl start chronyd.service && systemctl enable chronyd.service
ssh root@ks-node03 systemctl start chronyd.service && systemctl enable chronyd.service
ssh root@ks-node04 systemctl start chronyd.service && systemctl enable chronyd.service
- 如果有数据盘,还需要挂载数据盘,将数据盘挂在到
/var/lib/docker目录,这样所有容器就会使用数据盘。具体操作步骤请参考阿里云官方文档。
安装 Kubersphere
- 安装Kubersphere和Kubernetes的依赖组件。
yum install -y conntrack socat ebtables ipset
ssh root@ks-node01 yum install -y conntrack socat ebtables ipset
ssh root@ks-node02 yum install -y conntrack socat ebtables ipset
ssh root@ks-node03 yum install -y conntrack socat ebtables ipset
ssh root@ks-node04 yum install -y conntrack socat ebtables ipset
- 下载KuberKey,并设置地域为中国,以免无法正常访问Google或Github。
export KKZONE=cn
curl -sfL https://get-kk.kubesphere.io | VERSION=v1.1.0 sh -
chmod +x kk
- 通过KuberKey创建配置文件。
./kk create config --with-kubernetes v1.19.8 --with-kubesphere v3.1.0 -f config.yaml
根据当时最新版本为例。
- 编辑刚创建的配置文件config.yaml,并根据上述环境信息进行修改。此处提供安装时的配置文件供参考,更多信息可参考KS的官方文档。
- 执行下列命令,开始安装KS和K8s。
./kk create cluster -f config.yaml
安装完成后,将看到类似下面的信息。
#####################################################
###              Welcome to KubeSphere!           ###
#####################################################
Console: http://10.100.6.124:30880
Account: admin
Password: P@88w0rd
#####################################################
https://kubesphere.io             20xx-xx-xx xx:xx:xx
#####################################################
- 配置安全组,放行 30880 端口,通过 EIP+ 30880 端口即可访问到KS 控制台。
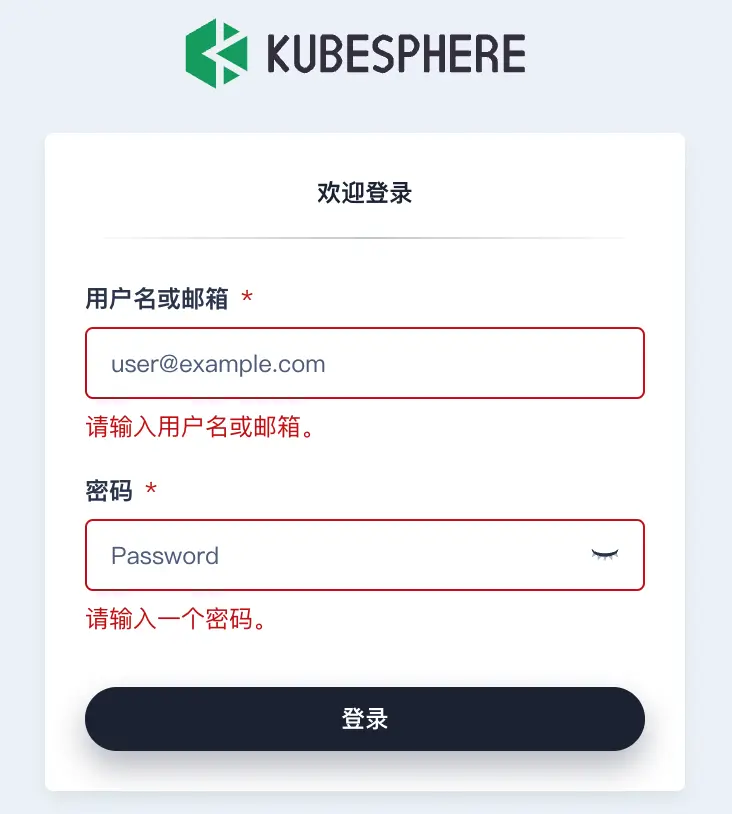
- 登录后修改默认密码。
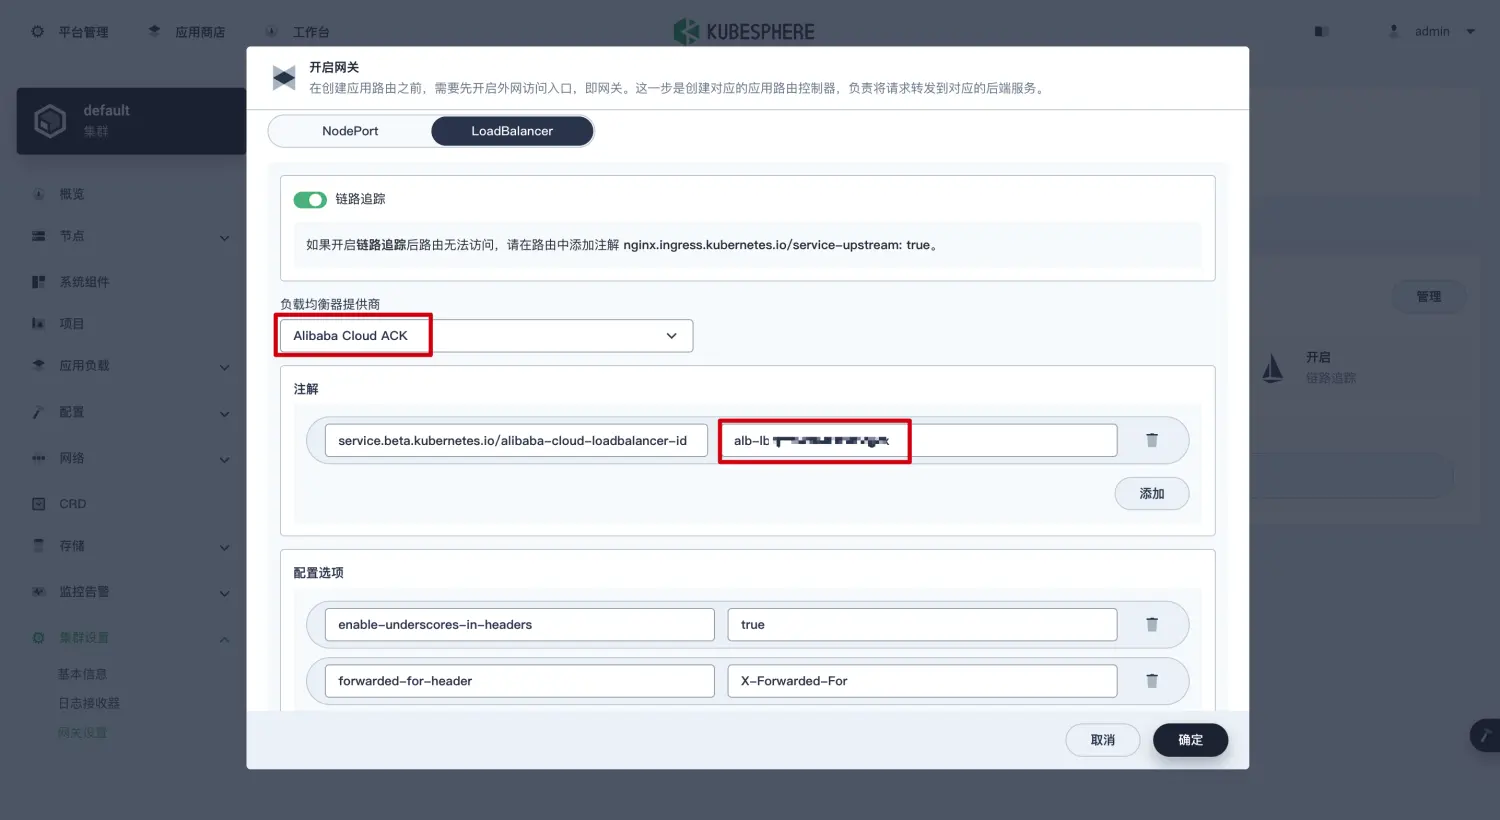
- 进入 集群设置 > 网关设置 > 新增网关,参考下图进行设置。
- 进入 应用负载 > 应用路由 > 创建,参考下图进行设置,即可创建通过域名访问到 KS 控制台的路由。
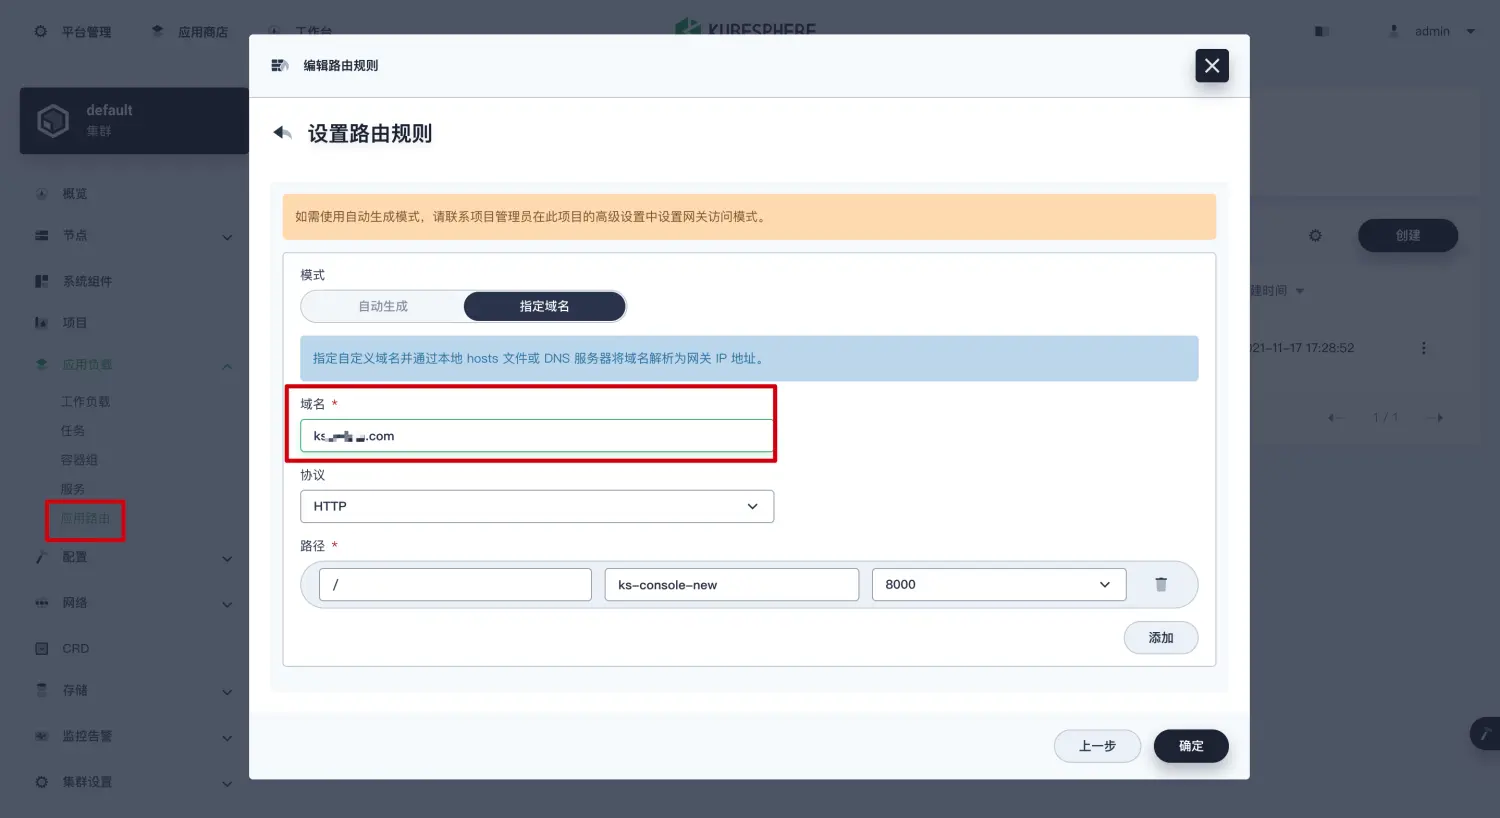
至此,可通过域名的方式直接访问 KS 控制台。
- 0
-
分享